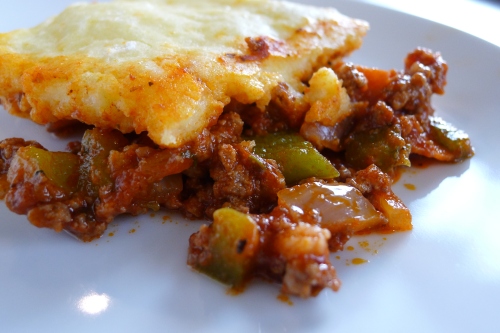
Pizza Popover Casserole

OK,  if that sounds gross to you (which it doesn’t to me, but whatev) hear me out. You know how you used to buy a pizza crust or a pie crust at the market whenever you wanted? Before you couldn’t do gluten? You know what a pain it is now you have to make those from scratch,  so you just don’t. You don’t make anything requiring crusts anymore, because it’s just too much effort.

This is an answer to that problem! The popover topping is mixed in a bowl and poured on top. Easy peasy.  And so tasty. I also make this with a chicken pot pie filling, but that is a recipe for another day.

I adapted this recipe from one of those little recipe booklets they sell at the checkout in the grocery store. I have no idea which one, as I ripped the page out to save it. I bought the booklet first, of course.

Popover Pizza Casserole

Pizza Popover Casserole (from Feeding My Kid)

1 lb. ground beef

1/2 onion, finely chopped

1 green pepper, finely chopped

4 oz. mushrooms (button or cremini), sliced

15 oz. pizza sauce (or homemade spaghetti sauce. Here is the recipe I use.)

2 oz. pepperoni, diced

Pinch fennel, crushed

1/2 tsp. dried oregano

1/2 tsp. dried basil

For the topping:

2 eggs

1 cup non-dairy milk of your choice (unsweetened or plain)

1 Tbsp. oil (I use grapeseed or melted coconut)

1 cup gluten free flour mix

Preheat oven to 400 degrees. In a large skillet, brown ground beef. Remove with a slotted spoon to another bowl. In drippings, cook onion and pepper until tender crisp. Add mushrooms and cook until tender. Add back in ground beef, pepperoni, spices and pizza sauce. Heat through.

In a medium mixing bowl, mix together eggs,  milk and oil. Beat with an electric mixer for 1 minute. Gradually add flour and beat with an electric mixer for an additional minute.

Pour beef mixture into a greased 9 by 13 pan. Pour egg topping over the beef evenly. Bake for 25 to 30 minutes, until topping is puffed and golden brown.

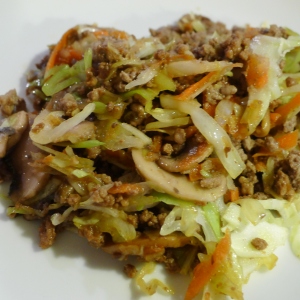
Asian Ground Beef Stir Fry (gluten free, dairy free, egg free, peanut and tree nut free)

I may have mentioned before how much my children and husband love hamburger. And how much I really don’t.  Fortunately (or unfortunately, depending on your perspective) hamburger gets heavy rotation at our house because it is cheap, quick and gets eaten. I am always looking for new ways to fix it.

I found this recipe from the website Nom Nom Paleo on Pinterest. I decided to “kid-ify” it, because let’s be honest, my kids would not eat broccoli slaw. Or scallions. And they can’t have fish sauce  anyway.

Turns out I actually like it too! And you know you have a winner on your hands when your four-year old asks you to help him to get it on the fork and “be sure to get that cabbage stuff on it too.”

asian ground beef

Asian Ground Beef Stir Fry (from Feeding My Kid)

Adapted from this recipe on  Nom Nom Paleo.com

Ingredients

2 tablespoons of grapeseed oil

1 lb of ground beef

1 small onion, finely chopped

1 lb of thinly sliced mushrooms

½ cup of shredded carrots

1-2 cups of shredded cabbage (I use the angel hair pre-shredded to save time)

2 tablespoons of gluten free soy sauce

1/2 tsp garlic powder

1 tablespoon fresh grated ginger (or WAY less if you use powered)

Heat one tablespoon of the oil in a big skillet. Add the beef and cook until browned throughout.  Remove from pan. Add the other tablespoon of oil to the pan and heat.  Add the onion and carrots and cook until the onion is translucent. Add the mushrooms and cook until they are nicely browned. Be sure to use a big pan, because as Julia says, “Don’t crowd the mushrooms” *- it really is the key to getting them beautifully caramelized. Add the cabbage and cook until it wilts a bit.  Mix together the soy sauce, garlic and ginger and add to pan. If it is looking a bit dry to you, add water a tablespoon at a time.

If I am feeling motivated, I serve this with rice. Most of the time I serve it as is, and the kids gobble it up. We don’t put it in lettuce cups as in the original recipe, but that seems like a fine idea for when I can get my kids to eat lettuce.

*Semi-obscure Julia Child reference.

Grilled Pork Ribs (gluten, dairy, egg, peanut and tree nut free)

These. Are. The. Bomb.

That’s really all I have to say.

Grilled Pork Spareribs (from Feeding My Kid)

3 pounds pork ribs (spare, country, etc.  – I buy whatever is on sale)

1 – 6 oz. can of frozen lemonade, thawed

1 cup gluten free barbecue sauce (We use Stubbs brand)

Add pork ribs to a large soup pot. Cover with water, bring to a boil. Reduce heat to low, and simmer  for 1 hour. Yes, you really need to do this. It precooks the meat, makes it nice and tender, and you spend less time standing in front of the grill later.

Meanwhile, mix the thawed lemonade and BBQ sauce in a large glass pan. When ribs are done, add ribs to marinade, turning over to coat. Let marinate for at least four hours, up to eight hours.

Heat grill to medium. Grill pork for 30 minutes, turning and brushing frequently with marinade.

Place remaining marinade in a saucepan and bring to a boil. Reduce heat and simmer for 15 minutes. Use marinade as a dipping sauce for your ribs.

Chicken Tortilla Soup (gluten,dairy, egg, peanut and tree nut free)

Sometimes it surprises me, the food that my kids gravitate towards. I pretty much expect that they will always eat spaghetti or waffles, but I wasn’t expecting this one to be a “down it as fast as you can and ask for more” recipe. But it was.

Chicken Tortilla Soup (from Feeding My Kid)

1 lb. boneless skinless chicken breasts (or thighs)

28 oz. chicken broth (we use Pacific brand)

1 – 15 oz. can cannellini or black beans

1 – 15 oz. can diced tomatoes

1/4 cup fresh lime juice

1 -4 oz. can diced mild green chiles  (Optional. I add these at the end as a garnish, because my kids think they are too spicy. No really. I can’t believe it either.)

1 tsp. powdered garlic

1 tsp ground cumin

1 tsp dried oregano

salt, to taste

5 corn tortillas, cut into thin strips

Preheat oven to 375 degrees. Spread the tortilla strips on a baking sheet, making an effort to not overlap them. Bake until toasted and dry, checking every five minutes to avoid burning. Remove from oven and cool.

In a large stockpot, bring chicken stock to a boil. Add chicken and poach until chicken is cooked through (about 20 minutes). Remove chicken from pot and let cool. Add beans, tomatoes and spices to pot, turn down heat to simmer. Using two forks, shred the chicken and add to pot.  Simmer for ten minutes to meld the flavors. Garnish with tortilla strips and serve.

Sewing for Boys Sew Along – Luka Hoodie

The Luka Hoodie was the August pattern for the Sewing for Boys Sew Along. I finished it a while ago (though not by the end of August), but I  hadn’t gotten around to taking pictures. Today we had an outing in the cold that offered the opportunity. Sewing For Boys - Luka Hoodie

I made this one out of a Michael Miller skateboard print that I had in my stash, a coordinating grey Kona cotton, and a lining of aqua flannel.

Sewing for Boys  - Luka Hoodie

For me, the pattern came together fairly easily. I did a careful read of the pattern before cutting and realized that the picture in the book does not jive with the cutting instructions, and I really did want my pocket to be in the skateboard fabric, so I had to account for that.

About half way through the project,  I bailed on on making the lining with no seams showing. I just wanted to get it done, and after looking at the diagrams, I couldn’t absorb the origami of how to make it work with no seam showing. Oh well. It’s on the inside anyhow.

Sewing For Boys - Luka Hoodie

Overall this is a really cute pattern. There are just a couple of things that bothered me about the finished product. One is the “v” on the chest where the bottom pocket joins the two top front pieces (just below the buttons.) It is hand stitched closed, and maybe it is just my hand stitching, but it shows horribly – where the machine stitching stops and the hand stitching starts.  It bothers me so much I might actually rip it out and find a way to machine stitch it closed. The other thing is that the elastic in the hood looks a bit wonky to me. I think I would like the hood better with a drawstring or no gathering at all. This may be because the only other hoodies I can compare to are either knit or ripstop nylon, none of which have elastic.  Other than those two details I liked this pattern.

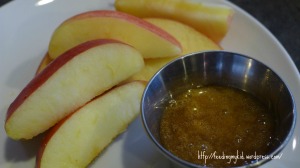
Caramel Apple Dip (gluten, dairy, egg and nut free)

One of the things that I wanted to do with the boys for Halloween was this DIY caramel apple bites I found via Pinterest:

Photo: Ellie’s Bites Decorated Cookies

How cute is that? Unfortunately, I have to mail-order allergen safe sprinkles and didn’t get around to it in time. Candy corn is out because of either egg or nut in every brand I’ve found, and  marshmallows that are safe for us don’t come in a mini size.  Also, food on a stick:  I’m just not sure my one and four year old are ready for it. So, I decided to dial it back quite a bit and just do apples with caramel sauce for a snack.

Order of Business No. 1: Find a safe caramel sauce recipe.  I found a vegan recipe that called for two cups of sugar, AND corn syrup. Yikes.

Order of Business No. 2: Find a safe caramel sauce recipe that doesn’t make me feel like a bad mother. I found this paleo recipe from Paleo Parents. I feel much better about honey and maple syrup. It’s still sugar, but at least it’s not super processed, and it is a cup versus 2 1/2 cups. But it bothered me that this recipe had no butter in it. I mean, every caramel sauce recipe I have read (and I read a lot, looking for a safe one) had either butter or heavy cream. So I decided to tweak the paleo recipe and throw  in some Earth Balance margarine (if you use pastured butter instead, it would still be paleo – I just can’t do that with my kids’ dairy intolerance.)

Are you worried that paleo caramel just won’t taste like “real” caramel? Don’t be. The four-year old asked if he could drink the caramel. The one-year old didn’t ask – he just did it anyway. Yeah, it’s good.

*If you are making this and can’t tolerate dairy (butter) or the soy in Earth Balance sticks, you could use the soy free Earth Balance formula that comes in a tub. Or, possibly a bit of coconut milk. I think that will be what I try the next time I make this.*

Gluten, dairy, nut free caramel dip from Feeding My Kid

Safe Caramel Apple Dip (gluten, dairy, egg and nut free)

Adapted from PaleoParents, original recipe here.

1/2 cup maple syrup

1/2 cup honey

1 1/2 Tbsp. Earth Balance margarine

1/2 tsp. baking soda

You have to keep an eye on this one. It involves medium low heat, and lots of patience and whisking. It’s worth it.

In a medium saucepan, combine the maple syrup and honey, heat over medium heat until it starts to bubble, stirring frequently. After it is bubbling, turn heat down to medium low, and whisk constantly, cooking for about 10 minutes, until the maple syrup and honey come together. Remove from heat, and stir in margarine and baking soda. The combination will turn it from a clear liquid to an opaque color, but more stirring will make it clearer.

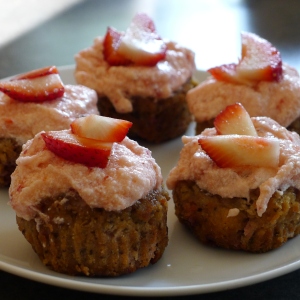
Strawberry Birthday Cupcakes (gluten, egg and dairy free)

For his fourth birthday, my son requested strawberry cupcakes.

Well, actually that is not true, he requested lemon, which I made and he hated, but that’s another story. The second time around, for his actual birthday (yes, I made him cupcakes twice), he wanted strawberry. And, being the procrastinator I am, I waited until the night before to figure out how I was going to make gluten, dairy, egg free strawberry cupcakes.

Oh yes I did.

Luckily, I have Pinterest. (Well, technically YOU have Pinterest too.) I searched and found this cupcake recipe from Elana’s Pantry. And I found this cupcake/frosting recipe from The Gluten Free Canteen. I made modifications to both (making the cupcakes egg free and the frosting dairy and booze free) and viola…

 Rustic looking, but freaking delicious tasting cupcakes.

Strawberry Cupcakes (from Feeding My Kid)

 Adapted from Elana’s Pantry, original recipe here. The original calls for four eggs. I was nervous trying to modify  with so many eggs in the original recipe, but it did work. I used a mixture of flax eggs and Ener G Egg Replacer to hedge my bets.

½ cup coconut flour

1 Tbsp arrowroot powder

¼ tsp salt

1/2 tsp baking soda

2 Tbsp ground flaxseed plus 6 Tbsp water (these are the flax eggs)

3 tsp. Ener-G egg replacer plus 4 Tbsp water (these are the egg replacer eggs)

½ cup sugar

1 Tbsp vanilla extract

½ cup finely chopped fresh strawberries

Preheat the oven to 350°F. Line 8 muffin cups with paper liners. Combine the coconut flour, arrowroot powder, salt, and baking soda. In a separate medium bowl, whisk together the flax, Ener G egg replacer and the water (10 Tbsp.) Let sit five minutes, and whisk again. Add sugar and vanilla extract to the “eggs” and mix to combine. Add the wet ingredients into the coconut flour mixture with a handheld mixer until thoroughly combined, then fold in the strawberries.

Scoop ¼ cup of batter into each paper liner. Bake 20 to 25 minutes, until a toothpick inserted into the center of a cupcake comes out clean.

Elana recommends frosting with whipped cream or Strawberry Meringue. Recipes for both are in her excellent cookbook Gluten Free Cupcakes and neither of which will work with our food allergies. So, enter the strawberry “buttercream” recipe from Gluten Free Canteen.

Strawberry “Buttercream” Frosting (from Feeding My Kid)

Adapted from The Gluten Free Canteen, original recipe here.

12 Tbsp Earth Balance (the stick kind), room temperature 

1 tsp vanilla

4-6 Tbsp  macerated and puréed strawberries (the original recipe calls for macerating these in massive amounts of booze, which would be awesome, but completely inappropriate for my four-year old.  I macerated mine by chopping finely, adding granulated sugar, and sitting in the fridge for a few hours prior to whipping this frosting up.) Set aside  a few strawberries for garnish – i.e., don’t macerate them.

4 cups powdered sugar

Cream together Earth Balance and vanilla. Add 4 tablespoons of the strawberry puree until thoroughly combined. Add  powdered sugar and mix on low until combined, then mix on high until light and fluffy.  Add more strawberry puree by the tablespoon until the buttercream looks like frosting and tastes as strawberry-ish as you desire. Use to frost your cooled cupcakes.

Boy Books – Dog Loves Books and others

Here are the library books we have been enjoying this week.

Dog Loves Books by Louise Yates. A delightful story about a little white dog who opens a bookstore. I love little white dogs. And I love books. This one was a no brainer.

Questions, Questions by Marcus Pfister. I love this book because gets kids into the mode of asking questions: “How do seeds know to grow, to reach up from the earth below?” “Does a whale make up a song so other whales will sing along?”

I’m the Best by Lucy Cousins. You may know Lucy Cousins of Maisy fame. We do love Maisy, but I have to say I think is my favorite of her books. Dog, who is the main character, is such a brat.

Library Lion by Michelle Knudsen and Kevin Hawkes. Oh, if you haven’t read this, please do. The story is about a lion who wanders into a library and finds his niche. The story and illustrations are just awesome.

411 Granola – gluten, dairy, egg and nut free

Store bought granola is too expensive. Store bought granola that is gluten/dairy/nut free is even more expensive, and I have found that the taste is hit or miss.

This is a really basic granola, which happens to be my favorite kind. The last time we made this, it disappeared so fast  I didn’t have time to photograph it. It’s that good.  We like it with milk for breakfast, out of hand for snacking, or layered with fruit and yogurt for a parfait.

I call it 411 granola to remind me of the amount of each ingredient. Truthfully though I usually double this recipe and make 822 granola. It really goes that fast around here.

feeding my kid gluten free nut free granola

This is a great recipe for cooking with your kids. Monkey helps me make this all the time.

411 Granola (from Feeding My Kid)

4 cups certified gluten free rolled oats

1  cup coconut oil, melted

1 c. maple syrup

Preheat oven to 300 degrees.Mix the  ingredients and pour onto two baking sheets lined with parchment paper. Bake for 40 minutes, stirring every 10 minutes to keep the outer edges from burning.

After this cools, you can add dried fruit or raisins if you so desire.

Sewing for Boys Sew Along – The Henry Shirt, Finally.

Okay, so I am a month and a half past the deadline for having this done for the Sewing for Boys Sew Along. But it’s done!

feeding my kid: the henry shirt

I ordered custom fabric for this shirt from Spoonflower. You don’t know Spoonflower? If you are at all addicted to fabric, don’t go there. No really. You will spend massive amounts of time, and possibly money, looking at all the gorgeous possibilities.

feeding my kid: the henry shirt

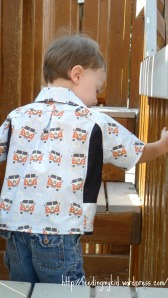
I had my eye on this VW bus print for a while. And then, the Henry Shirt pattern came up in the sew along. For some reason, the first thing that came to mind in looking at the pattern was retro bowling shirt. What better colors for a retro bowling shirt that blue and red? I had to buy the fabric, of course.  I paired it with a basic black kona cotton, and pearl snaps. My husband calls this shirt “Monkey’s hipster shirt”.

feeding my kid: the henry shirt

I actually finished this shirt at the end of July, but then we all got sick. Today was the first day that  I had an opportunity to photograph it. We went to a new (to us) playground, and Monkey was so excited that most of my shots looked like this:

“Bye Mom!”

I am surprised I got any decent shots at all.

This shirt was an advanced pattern, and I would say that it was correctly classified.  I have been sewing for 26 years (OMG – can I be that old?),  and have fairly advanced sewing skills (pattern alterations, matching plaids, etc.)  Still, there were a couple of points where I relied on the excellent tutorial by Thar She Sews. One was in attaching the side panels to the front panel – the shape of the pieces and the way in which it goes together is very counter-intuitive, and the figures in the book are not helpful on this point. Day four of the tutorial was very helpful. The other tricky spot for me was the collar. For the life of me, I could not tell which end was the bottom. Luckily, Krista’s day six tutorial  helped me out. The fact that she made this shirt in two high contrast fabrics was also helpful, because it allowed me to see how the front and side (and side and back) panels came together. This was something I couldn’t tell from the pictures in the book, which used two lower contrast fabrics. 

feeding my kid: the henry shirt

All in all, I liked the pattern a lot.  It took a lot of time to come together the first time, but I think if I made it again it would be quicker. Next time around I am thinking something more monochromatic.

Now, on to the Luka Hoodie to catch up with the sew along!

Like this post? Check out my other Sewing for Boys Sew Along Projects:

January – Raw Edged Raglan Tee

February – Kickin’ Back Pants

March – Easy Linen Shirt (okay, I didn’t make this, but the post is a round up of my favorites)

April – Treasure Pocket Pants

June – More Treasure Pocket Pants – yeah, I got a little behind in the Sew Along.